Zimmerit patterns- general guide.
Different zimmeritt patterns were applied to certain
vehicles which may be due to preferences at particular plants.
Below
are common patterns for some vehicle types noted by the Paul A. Owen:
|


Vehicle
Name
|
Pattern
|
Note(s)
|
Brummbar
|
Ridged
|
All
but early
|
Elephant
|
Ridged
|
Not
on Ferdinand
|
Hetzer
|
Unknown
|
Not
known if applied
|
Jagdpanzer
(very early)
|
Checker
|
Early
mantle vehicles only
|
Jagdtiger
|
Ridged
|
Possibly
on Porsche suspension vehicles
|
Kingtiger
(early, mid)
|
Ridged
|
All
Porsche turrets and early Henschel
|
Panther
D(late), A(all), G(early)
|
Vertical
ridged with secondary cross-hatch
|
Ausf
D rebuilds only
|
Pz
III M, N (late
|
Ridged
|
Very
rare
|
Pz
IV H(mid/late), J(early)
|
Ridged
|
Sometimes
on side skirts
|
PzIV
L/70 (early)
|
Ridged
|
-
|
Pz
Jg IV Ausf F
|
Ridged
|
All
|
Sutg
III G (early, mid)
|
Waffle
|
-
|
Stug
IV (early, mid)
|
Ridged,
"zigzag" on hull sides
|
-
|
Sturmtiger
|
Ridged
|
Zimmerit
left over from conversion
|
Tiger
I (mid, late)
|
Raked
on hull, ridged on turret
|
All
late
|
Methods of Zimmerit
Scale Reproduction.
Here
is a list of selected methods from Paul’s article with their pros and cons.
|
A
product from Australia made of latex material in sheets with the exact panels
for a particular AFV kit moulded into them.
|
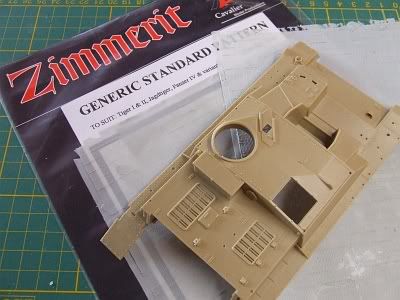
Pros:
Easy and realistic.
Cons:
Currently hard to find outside of Australia. Restricted to one pattern. Looks
a little too thick.
Hot
Knife Scribing Method
This
employs a hot knife (with rheostat for temperature control) to scribe the
zimmerit pattern into the kit parts. A pattern is drawn on the model as a
guide and the zimmerit is melted into the surface following this pattern.
Pros:
Free (assuming you have the tools.)
Cons:
Pattern looks fake. Only one shot at a good pattern. Easy to the destroy
model. Difficult to model damage zimmerit.
Injection
Moulded Styrene Sheets
Pros:
Easy to use. Readily available.
Cons:
Expensive. Needs thinning out (at least Italeri parts do.) Need to modify for
different vehicles.

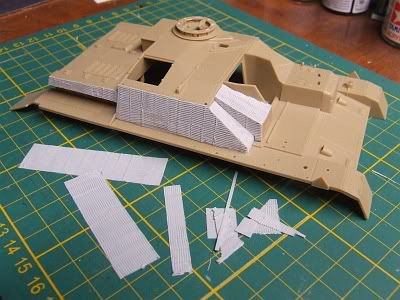
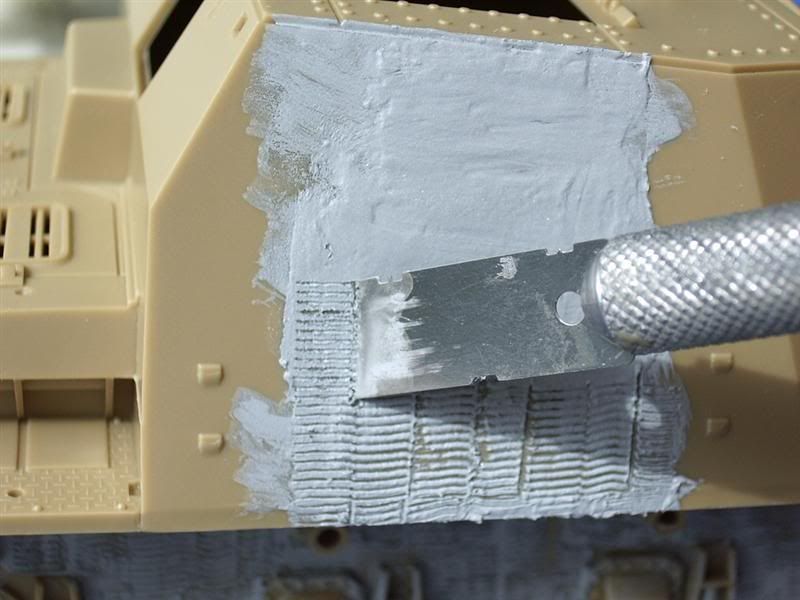
Textured
model putty method looks the best because it is replicates in scale the way
Germans applied zimmerit to their AFVs'. It is not difficult as it sounds or
as it’s described in literature. The application description follows in the
next post.
Pros:
The most realistic DIY method. Free!
Cons:
Intimidating at first. Time consuming
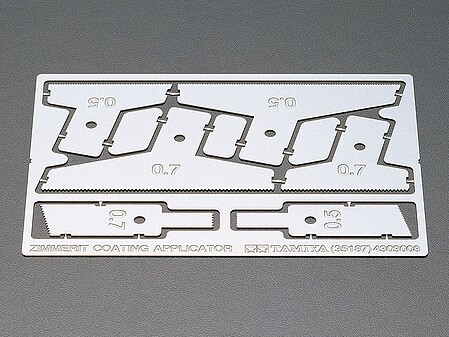
Putty
Raking - "The Tamiya Method"
This
is similar to Putty Texturing method except the pattern is made by dragging a
serrated tool across its' surface using a Tamiya set of tools (catalogue
number 35187) specifically made for this purpose - hence "The Tamiya
Method". DIY tools can be used including razor saws, corrugated metal,
etc. The pattern produced looks good but fails to capture the true troweled pattern well. The method is perfect though for Tiger I's which received raked
on zimmerit coats.
Pros:
The easiest and most fool proof of the DIY methods. Free!
Cons:
Only accurate for "raked" pattern, as on Tiger I hulls.
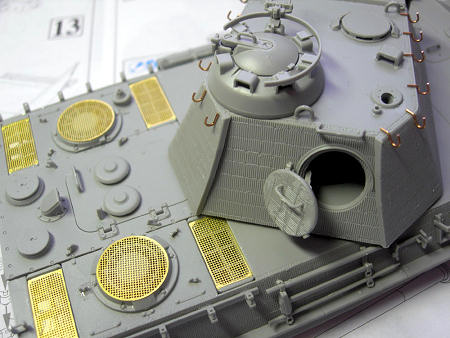
Resin
Replacement Parts
Pros:
Perfect zimmerit representation (assuming the guy who did the master was
good!)
Cons:
Very expensive. Vehicle specific. Difficult to modify. Replacement kit parts
often simplified.
|


R&J Products Zimm-it-rite* or Miliput Fine Grain Epoxy Putty

This
material is very similar to epoxy putty but is much softer and easier to work
with. It is used in the same way as plastic putty in the Textured putty
method. According to Paul, it is the best method available currently for
simulating Zimmerit which is described in the next post.
|
*Note: R & J Enterprises USA s used to make Zimm-it-rite but has discontinued this product according to their web site updated 27th May 2007.
Pros:
Excellent material for use with the textured putty method, as it has a long
working life and doesn't affect the plastic.
Cons:
None.
Textured
Paper Dinner Napkins
This
is the best method for smaller scales, 1/48th, 1/72nd and 1/76th
which was described in FineScale Modeler. It uses paper dinner napkins
embossed with appropriate pattern cut up into roughly the shape needed and coated
for strength; Paul used plastic goo (sprue dissolved in liquid cement) and
Krazy Glue. The material is trimmed to exact size and glued to the model.
Pros:
Almost free. Easy. Fun to use (I tried it and it was!)
Cons:
Pattern may look soft. Restricted to one pattern.

These
innovative, "quick fix" zimmerit sheets are embossed paper sheets which
don't look convincing with patterns too indistinct. It is difficult to get
the sheets (which do not stretch) to cover an area with compound curves (a
surface which curves in more than one axis.The Tamiya sticker sheet enables easy reproduction of Zimmerit by simply applying the stickers on the Model and then painting a realistic Zimmerit effect
Pros: Easy. Was the best "quick fix" method until Cavalier's Zimmerit came out.
Cons:
Expensive. Difficult to fit to compound curves. Looks fake - too smooth.
|
NEXT:
King Tiger Build Proper- Prepainting Ritual
PREVIOUS RELATED POSTS:
No comments:
Post a Comment