After building the King Tiger (KT) kit and painting preparation now comes Painting and Weathering. Doing it for the first time, I did my usual research and prepared some painting guides based on techniques I came across with that seemed simpler for me to understand- or so I thought. The first guide I used is the Painting and Weathering Technique by Adam Wilder as published in missing-lynx.com. Adam's article discussed in detail and demonstrated the painting and weathering techniques he used to achieve realistic weathered finish on his armor models. Actually, it follows the Scale Model Painting and Weathering Process Flow I posted previously.
I summarized in a table format the systematic group of processes for painting and weathering as Adam laid out, which helped me out in my first attempt to paint a scale model ever. Some of the techniques within the guide are already used and discussed in other publications which were adopted. Credit was given by Adam to Tony Greenland and Makoto Takaishi for some of their techniques.
I'm not sure actually if it can be of help to you but I just wanted to post it also just in case it can be of use to some newbies like me.
Painting
|
|||
STEPS
|
Paint/Thinner/
etc.
|
Amount/Application
|
Comments
|
A) Airbrushing
|
|||
base coat
|
Tamiya dark green XF-61,
|
3 parts
|
|
Tamiya thinner X-20A,
|
one part
|
||
Tamiya semi-gloss varnish X-22
|
one part
|
||
Shadowed appearance-
|
Tamiya dark green,
|
1 1/2 parts
|
AB flat open surfaces with a
lighter shade of base color
|
flat white XF-2,
|
1 1/2 parts
|
AB flat surfaces between any
extrusions (grab handles, rivets, bolts, and weld seams).
|
|
Tamiya thinner,
|
1 part
|
Keep AB perpendicular to the
surface of the model.
|
|
Tamiya dark green XF-61,
|
1 part
|
||
B) Applying a Wash
|
|||
Thinner (Better Way brush cleaner)
|
1/4 a glass paint jar
|
Toothpick to apply small paint
amounts to thinner allows you to easily regulate wash tint .
|
|
Winsor & Newton ivory black
oil paint
|
15% paint and 85% thinner.
|
When wash is blended, put in a
dust free booth and let dry for a day.
|
|
Winsor & Newton burnt-umber
|
# 2 round brush to mix/apply paint
over the entire model
|
When the wash is dry start adding
oils.
|
|
After 1st coat, continue brushing
the model (without adding any more wash) with downward strokes to blend paint
evenly over the surface.
|
|||
C) Adding Oils- to give base coat a semi gloss finish to add depth that
resembles painted steel; manipulate base color to a more desired color and
further blend the base coat with the over-sprayed areas.
|
|||
Winsor & Newton artist oils- black,
white, and the three primary colors
|
toothpicks to mix artist oil
paints
|
use color wheel to aid with mixing
the colors
|
|
Linseed oil and varnish
|
|||
Russian armor
|
light coat of red-brown oils
|
1. Dip # 2 round oil brush in red-brown
mixture; brush off almost all from brush to sheet plastic.
|
|
Tamiya dark green
|
2. Brush over entire upper hull
and fenders using downward strokes. Ignore from under the fenders down and running
gear as these will be over-sprayed with earth colors later.
|
||
German Tiger tank
|
brown or red-brown color (artist
oils)
|
3. When the paint stops spreading,
re-dip into paint and wipe clean onto the plastic. Continue brushing until
the model from the fenders up is completely covered. Let this coat dry for
two days.
|
|
Talens Dammar picture varnish
glossy 081 (varnish for oils)
|
|||
Alkali linseed oil (artist grade)
|
used to improve the distribution
of the paint over the surface of the model
|
||
I used as base paint Tamiya Paint 81760 Acrylic XF60 Dark Yellow.
|
|||


On adding oils....
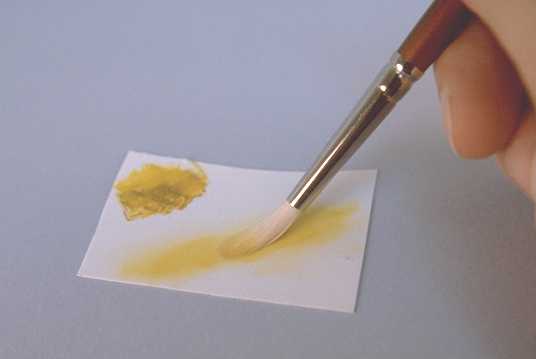 |
| The mixed color of artist oils along with the makeshift pallet of sheet plastic. Note how 99% of the pant is brushed from the brush before its applied to the model. from missing-lynx.com |
NEXT:
PREVIOUS RELATED POSTS:
King Tiger Build- Weathering by Adam Wilder
PREVIOUS RELATED POSTS:
No comments:
Post a Comment