After the Painting steps in Part I, the model will look like it has just come out of the war factory assembly line- which concludes your project if that is your goal- a "freshly minted" military vehicle. To add realism to your model however,some wear and tear will certainly enhance your scale modeling experience and appreciation which definitely makes the model stand out!
Weathering Process Flow:
14. Chips.Paint chips, rust chips, scratches etc can be applied with a very tiny brush or even a cocktail stick to any part of the vehicle- of course realistically to places where REAL exposure to the elements are expected to be. These should NOT be overdone,though.
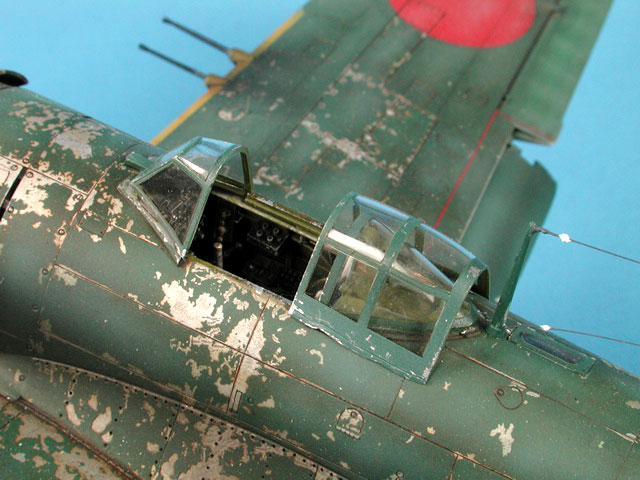 |
| Hasegawa 1/48 scale N1K2-J "George". from hyperscale.com |
Again, realism should be considered: lower vehicle parts and underside should receive a very light ‘dust’ layer with very thin paint.
 |
| The key with the airbrush (AB) doesn't to do with making the paint "thinner". It's keeping the AB about 6 to 8 inches from the model and keep it MOVING. Like this sprayed with a "buff" acrylic mixture at about 15 psi. from cs.finescale.com |
Mainly applied to vehicles; pigments and/or ground pastels can be applied with a brush which can be applied really thick mix with resin or varnish.
 |
| from cs.finescale.com |
Apply dry pigments or ground pastels in addition to the previous stage depending on the degree of weathering and muck you are replicating.
 |
| Note application of the dust coat. The right side of the toolbox shows the muddled appearance of the washes and thinned light earth. The left side shows the carefully blended coat of earth and dust. from missing-lynx.com |
Recent signs of wear & tear and usage (oil and fuel stains, rain streaks, boot marks, etc.) that the vehicle would have recently suffered and should appear on top of all other weathering.
 |
| Leaks and streaks are generally formed on vehicles depending on environmental factors and their maintenance. Examples could be rain streaks, marks from fuel or oil leaks(red arrows above) and rust streaks. from panzermania.com |
Another very light dust layer with thinned paint from an airbrush to blend everything together. This must be very light at this stage to avoid soaking or removing any of the dry pigments.
20. Final Protective Layer???
With a completed model, the temptation is to give it a coat of matt, gloss or semi-gloss varnish to protect it -which is likely to impair the look of the model. Varnish OVER dry pigments on the model will blend them together and may make them completely invisible; the different sheen on different parts of the model will become uniform .
If you feel the need to protect your model, then keep it to a minimum. Matt/flatt or dry pigmented areas should receive only very light varnish misting of varnish mixed with matte or varnishes with different sheens to add interest to the model.
PREVIOUS RELATED POSTS:
Tags: Scale Model Painting and Weathering Process Flow , Scale Model , Weathering, Painting, Process Flow , Model, Wash, Primer, pre-shading, Hasegawa 1/48 Typhoon, Hasegawa, 1/48 Typhoon, Typhoon, Base Colour, Tamiya Paint 81760 Acrylic XF60 Dark Yellow, Tamiya Paint , Tamiya , Dark Yellow, Highlight Base Color, Highlight , Post Shading, Airbrushing , Johnson’s Future/Klear, Johnson’s Future, Filters, The MIG Productions Company, MIG Productions, Detail Painting, MM Burnt Umber , Burnt Umber , Decals , Markings
, weathering, Paint chips, rust chips, scratches, Light Dust, Airbrush, Heavy Dirt , Dust, pigments, ground pastels, pastels, dry pigments >, Johnson’s Future, Filters, The MIG Productions Company, MIG Productions, Detail Painting, MM Burnt Umber , Burnt Umber , Decals , Markings
No comments:
Post a Comment