Thursday, February 28, 2013

Scale Model Painting and Weathering Process Flow I

This generic Scale Model Painting and Weathering Process Flow offers general definition of terms used in scale model painting and weathering, tips and the usual order of paint application  and other finishing layers commonly practiced- a simple guide that can help a newbie like me. This is by no means original (is there such a thing nowadays?) but of course is a result of research and my desire to learn more about this craft. It applies to military vehicles, aircraft, ship models, etc. that have a realistic non-gloss finish as glossy finishes (for car models) follows a different process flow.


Painting Process Flow:

This flow itself is just a general guide to achieve a good result on most models.  Not every step is required  in every case.  Some steps may actually require repetition to achieve a desired effect.

1. Wash all parts- to get a dust and grease-free surface. (see my previous post on this topic: King Tiger Build Proper- Prepainting Ritual.)
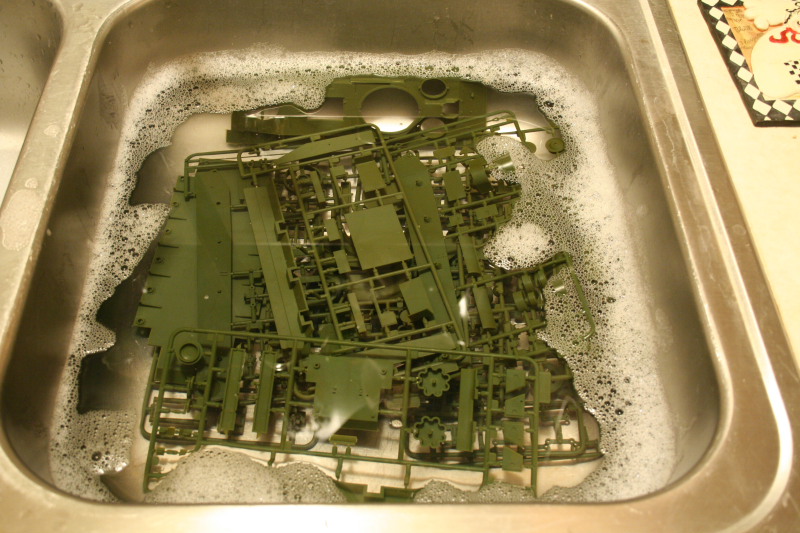
from www.bpmodels.net
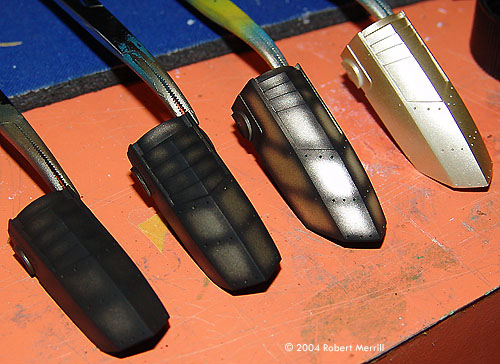
2. Primer- the very first coat of paint which goes directly to the model’s surface completely covered later by  coats of paint. The main reasons for priming your model is to show up surface defects, improve top coats adhesion and as pre-shading.
The primer coat on this figure revealed areas where the seam was still visible – marked with the red circles)
from kamm-mecha.com
3. Pre-Shading- (optional); A method of darkening areas, such as panel lines, shadow areas around detail and control surfaces, prior to the main color coats. Primer coat of the right color may make this step unnecessary.
Hasegawa 1/48 Typhoon Pre-shaded
from www.aeroscale.co.uk
4. Base Colour
Apply with airbrush if possible using several thin layers with care to NOT totally obscure any pre-shading.
I used as base paint for my King Tiger Tamiya Paint 81760 Acrylic XF60 Dark Yellow.
5. Highlight Base Color and/or Post Shading.
Airbrushing a lighter shade of the base color in the center of panels and upper surfaces. Post-shading (airbrushed darker shade of paint into recesses and along panel lines to simulate shadows) can be very easily overdone so very thin paints airbrushed very sparingly is done and built up in layers.  
from starshipmodeler.com
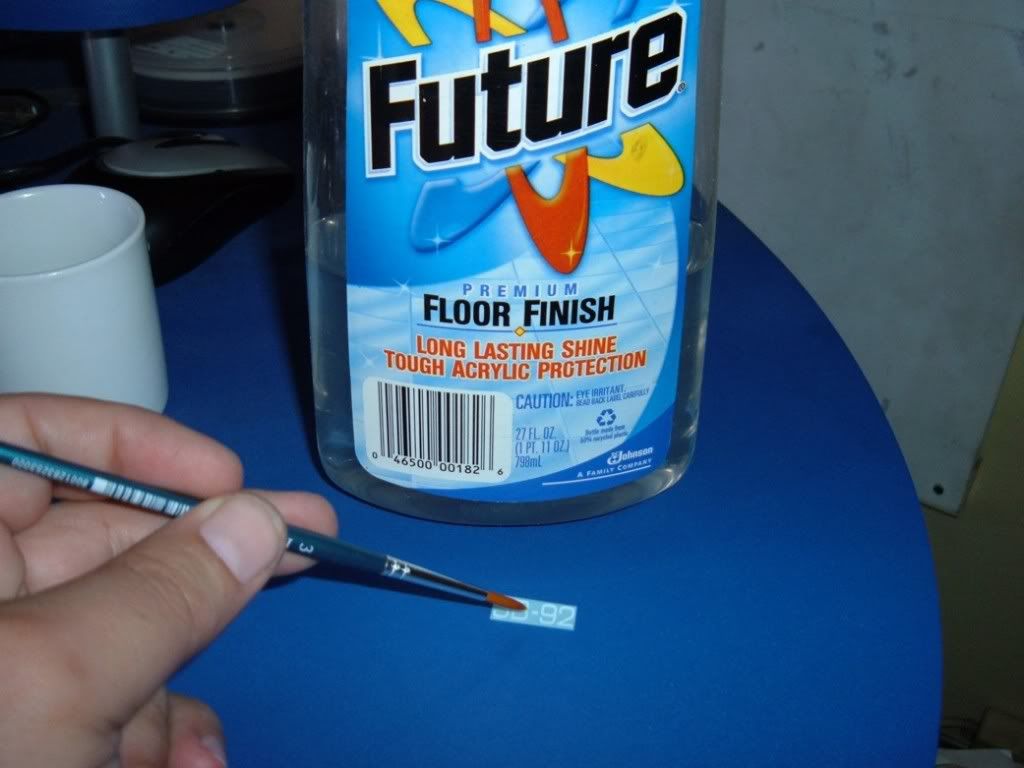
6. Protection layer (optional)-
Many modelers apply a thin layer of varnish (often Johnson’s Future/Klear to protect the work done so far from the next stages.
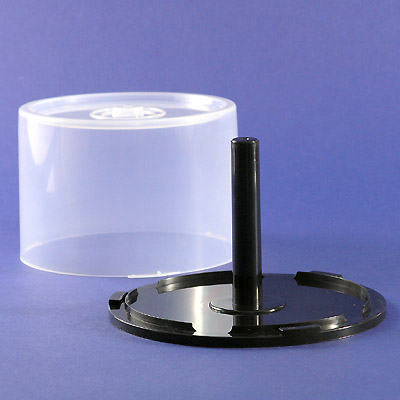
Future is a water-soluble acrylic floor coating that was developed by
 S. C. Johnson Company in Racine, Wisconsin for linoleum flooring.
see THE COMPLETE FUTURE  for its full use in painting scale models
 7. Filters (optional).
This is a very thin transparent paint layer that subtly alters the color of the base layer and helps blend in the colors on camouflage schemes. This has become increasingly popular now with commercial made filters available like the one made by The MIG Productions Company.

8. Detail Painting- Brush painting tools, vehicle accessories and similar tiny items.  
9. Washes- These may be applied to the whole model or limited areas of the kit (pin washes).  
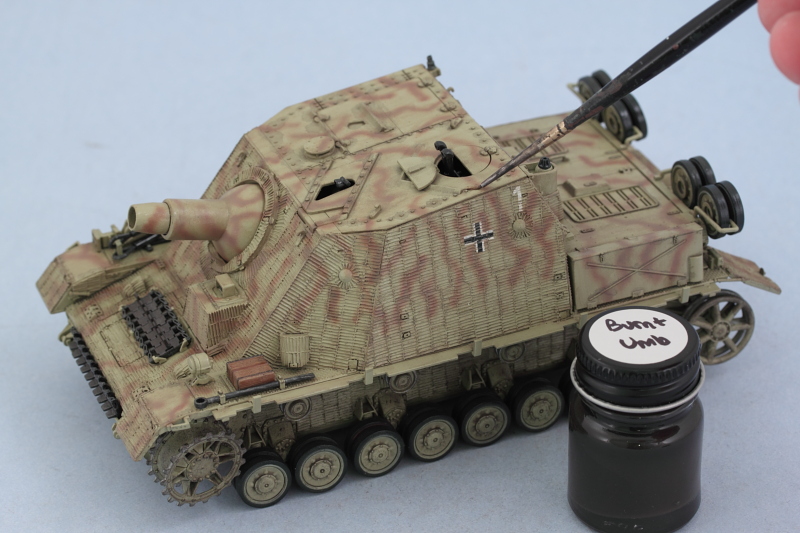
pin wash application using thinned enamel MM Burnt Umber and a pointed detail brush
from bpmodels.net

10. Gloss / protective layer. This is another protective layer in preparation for decal application as decals must be applied to a gloss or semi-gloss surface. Some apply this layer only in the decal area (some soak the decal in gloss varnish e.g.  Johnson’s Future/Klear so the decal ‘floats’ on a layer of varnish); while others prefer to put a gloss coat over the whole model depending on previous protective coats applied.
11. Decals / Markings- Applying decals and painting unit markings.
from patchesofpride.com
12. Dry Brushing- involves passing a paint brush that has almost no paint over the surface of the model and serves two purposes:  a. to emphasize kit textured surfaces (casting textures on armored vehicles; tread pattern on horizontal surfaces to improve grip, etc.; b. to highlight the edges of models as edges often look lighter because they reflect the light.
13. Protective Layer
This has two possible purposes: a. to seal in the decals before any serious weathering is done; b. to change the surface shine to it’s final effect using matte/flat or semi-gloss over the whole model.

Tuesday, February 19, 2013

OVERHAULIN' take on a 1965 Volkswagen Beetle!

Check out the OVERHAULIN' work done with the 1965 Volkswagen Beetle! Cool!


Overhaulin' is an American automotive reality TV show that ran for five seasons on TLC between 2004–2009, and currently on Velocity and Discovery (Cablevision). The returning season premiered on October 2, 2012 at 8pm EST.

Overview:

A lot of work had been done previously; bug was beyond repair
lack of certain structural pieces and too much rust were major issues.
from thesamba.com

What was done:


  • a 1967 replacement beetle acquired.
  • damaged front end given a  grafted new nose with custom Foose touches.
  • replaced hood handle with vintage VW emblem; dropped trim over the front of the emblem, cutting molding to make the trim longer to fit the full contour
  • removed rear apron and replaced with a ‘57 rear apron with longer swoop, giving the car a lower look.
  • took the original air vents, split into 2 pieces, welded, smoothed and finished into the rear.
  • color scheme - a two-tone paint: painted the roof, rear deck, interior, door jams and the hood black.  Butterscorch pearl was the elected BASF paint color for the lower half of the two-tone paint scheme.
  • installed a 200+ horsepower turbo charged engine, 4 times as powerful as the stock engine.


  • installed a wider diameter fuel line, new transmission and insulation to minimize road, engine and vibration noise in the vehicle.
  • installed a state of the art brake system
  • installed Gene Berg shifter for easy gear change
  • installed custom designed, tufted diamond patterned upholstery for the interior.
  • The original speedometer was salvaged and used


  • brand new sound system was also installed.
  • pulled the ashtray back and put the radio with a final trim to the dash.
  • 17” Foose Monterey wheels were wrapped in Pirelli P zeros


 Tags: , , , , , , , , ,

Wednesday, February 13, 2013

2004 Volkswagen Final Special Edition (Última Edición)- a unique GIFT to Pope John Paul II.

To take us briefly away from all the news on Pope Benedict XVI's resignation; lets have a look back at one of the most popular Popes in our lifetime and a somewhat curious though more pleasant connection with another German icon- the Volkswagen Beetle.
Pope John Paul II

On May 27, 2004, Mexico City, Mexico, at the conclusion of the week’s general audience, Pope John Paul II received a unique gift: the last Volkswagen “Beetle” made in Mexico-2004 Sedan Ultima Edition - Mexico. The blue “bug” was given to the Holy Father by a delegation of autoworkers from the Volkswagen plant in Puebla, Mexico, which stopped producing the model July 30th of last year. A group of Mexican sales representatives from the German automaker brought the car to the Vatican.

The bug is still displayed now in the Vatican museum as part of an exhibit devoted to the carriages and cars used by Popes over the years which includes the “Popemobile”.

This final special edition (badged Ultima Edicion), that more significantly marks final production of the air-cooled Beetle, was unveiled on Thursday 10th July, 2003 at a presentation at the Volkswagen plant where it is built in Puebla, east of Mexico City. VW Mexico will make only 3000 of the last edition which brings together aspects of the car's 70 year history.


The edition comes in either Aquarius Blue or Harvest Moon Beige, 1.6 engine, whitewall tires, a CD player with four speakers plus chrome bumpers, trim, hub caps and exterior mirrors, Wolfsburg symbol on bonnet above handle, chrome glove box badge, colour coded wheels, tinted glass, rear parcel shelf, VW Ultima Edicion plaque.

At 84,000 pesos, it costs about $1,300 more than the typical old-style Beetle. Final production of all Beetles ended in Puebla on 30th July, 2003 after 70 years of production worldwide. Some also produced in a light Metallic Blue.

The Specification of the 3000, 2003 Ultima Edicion Beetle is as follows – (Not to confused with the 3000 Last edition silver Beetles in the UK in 1978!)
Two colour combinations on offer:
Aquarius Blue with Franell Grey interior
Harvest Moon Beige with Black interior
Moldings, bumpers, wheel covers and door handles in chrome finishing
165/80 R 15 White-wall radial tires
5J X 15 body coloured stamped steel wheels
Complete carpeting in passenger room
AM/FM stereo CD player with 4 speakers and chromed antenna
Two exterior chromed mirrors
Specific noise isolation in passenger room
Glovebox cover and dashboard inserts in body color
Carpeted lid for rear trunk
Carpeted front trunk
Special commemorative plaque on glove box cover
Complete cloth upholstery
Bags on front back seats
Map’s bag on drivers door.
Chromed VW Logo on the top and Emblem with the coat of arms of the City of Wolfsburg at the front trunk lid
Tail lights with chrome moulding


PREVIOUS RELATED POST:

Cool Volkswagen SuperBowl commercials!


Tags: , , , , , , , , , , , , , , , , , , , , , , , , , , , , , , , , , , , , , , , , , , , , , , , , ,

Wednesday, February 6, 2013

Cool Volkswagen SuperBowl commercials!

Its the time of the year again with Super Bowl XLVII  between Baltimore Ravens  and the San Francisco 49ersCheck out some previous cool Volkswagen (VW) Superbowl commercials I found on the net!

Enjoy!


2010 Volkswagen PunchDub Super Bowl Commercial


2011 Volkswagen Beetle Super Bowl XLV television commercial


The Jon Spencer Blues Explosion provide a cover of Ram Jam's hit 'Black Betty' for Volkswagen's VW
new 'Black Beetle' commercial, which had its on-air debut during Super Bowl XLV.


2011 The Force: Volkswagen Commercial
A pint-sized Darth Vader uses the Force when he discovers the all-new 2012 Passat in the driveway. This award-winning commercial first aired during the 2011 Big Game.


2012 The Bark Side: Volkswagen Game Day Commercial Teaser
A canine chorus barks a familiar tune. A canine chorus barks a familiar tune in our Game Day teaser. Watch the 2012 Game Day commercial—it will all make sense.


2012 The Dog Strikes Back: Volkswagen Game Day Superbowl Commercial
In this extended version of our 2012 Game Day commercial, the sporty, all-new 2012 Volkswagen Beetle inspires Bolt the dog to get in shape, and an intergalactic superstar makes a surprise appearance.

PREVIOUS RELATED POST:


Tags: , , , , , , , , , , , , , , , , , , , , , ,

Friday, January 18, 2013

Custom VW Beetle Camper Mini Home

Volkswagen Beetle Mini Home- Built on a VW Beetle Chassis With Sleeping and Camping for 4!
Add caption

The DIY plans for this mini VW Beetle camper were originally published in Popular Mechanics and Mechanix Illustrated Magazines                                                              


Specifications
Camper Length: 125 inch
Camper Width: 79 inch
Camper Height: 73-1/4 inch
These VW-based mini-motor homes were being manufactured by a small shop in Irvine, California. MiniHome is built like any other camper using 1 x 2 structural members covered with paneling on the inside and conventional corrugated skin on the outside. According to a Robert Q. Riley Enterprises, LLC. webpost, he negotiated with the owner for the rights to publish the plans, which resulted to the publication of the  little motor home on the cover of Mechanix Illustrated magazine as MI's MiniHome.

The ad claims that with the MiniHome's wide offset wheels, beefed up stabilizer bar, and rear overload shocks; it handles very much like the stock VW. More product descriptions: "Inside, it has all the appointments and facilities of a standard camper. Appliances and storage space are situated across the rear. The butane stove and stainless steel sink in the left rear corner mount to a single module that slides out the side so you can cook and wash either outdoors or inside. A 50-lb size icebox is located in the center rear, and a closet is located on the right. Turning the large swivel-base chairs 180 degrees (backs against the windshield) opens up the center so the modular lower bed can slide out of its hideaway compartment. The cab-over section makes into a full-size bed by folding down a hinged extension."

Acceleration and cornering are much like the original VW but one does have to negotiate a few trial turns in order to gain confidence in its roll stability. The only detriment is limited rear visibility, similar to that of many other RVs. Also, maximum speed is reduced about 10 mph, and fuel economy suffers slightly because of increased air resistance at highway speeds.

PREVIOUS RELATED POST:


Tags: , , , , , , , , , , , , , , , , , , , , , , , , , , , , , , , , , , , , , , , , , , , ,

Wednesday, January 16, 2013

King Tiger Build Proper- Prepainting Ritual

After building the King Tiger (KT) kits by section and zimmerits application, next is painting preparation. The plan was to paint before the sections are fully assembled as the concern was that I may not be able to reach all of the spots once the kits are put together. The kit was built and prepped per major section (hull and parts, turret parts and main gun) with the minor sections (road wheels, sprockets, tracks, etc.) still detached from the main tank.(Please see my previous post "Scale Modeling Guide: Main Battle Tank Parts" as guide). My goal was to thoroughly prepare the kit surface for painting and to apply the paint on every nook and cranny of the tank.
KT sections temporarily assembled with sticky tape.


KT Hull section and parts with zimmerit applied
KT Turret, Main Gun section and parts with zimmerits applied . Note that this turret section was mounted
on a makeshift painting stand using a small camera tripod  and the inverted base of a CD Spindle cake box (see below).


Assembled road wheels, sprockets and parts mounted on modeling
clay using "tooth picks". This shot was taken post painting.
Continuous tracks broken down into parts mounted on modeling
clay using alligator clips on "tooth picks".This shot was taken post painting.
Cleaning the built kit before painting:

The oily and greasy stuff that comes with the plastic molding process and from your hands during kit build will stick on the kit surface and will affect paint surface adherence. Below are some materials used to clean  the kit before painting:

1. Soap and water. Dish washing liquid is usually used as it makes water wetter. The pre-assembled plastic model parts are soaked in the Dish washing liquid mixture of 4-8 drops in a 1/2 gallon of warm water for 10-12 minutes, rinsed in clean warm water and allowed to air dry.

2. Plastic Prep #546007 (from Polly "S") is a pre-painting cleaning agent for plastic surfaces used after the soap and water wash to remove any remaining mold release, Silicone or grease & oils still in crevices and again allowed to air dry before painting. It does a good job of lifting oils and mold release off of plastics and is reusable; you can run it through a coffee filter to keep it fairly clean.

3. 90% alcohol also works but you need to rinse it quickly before it evaporates and leaves all the gunk back on the surface. It also gets a bit heady in a closed room.

4. Some use vinegar on metal models because it's thought to act as a mild etchant to the metal making the paint adhere better to the model.


NOTE: It would be a good idea to use rubber gloves when handling the plastic after washing as well as there will be natural oils on your skin which will adhere on the dried parts.


NEXT:

King Tiger Build- Painting 
PREVIOUS RELATED POSTS:


Thursday, January 3, 2013

Volkswagen (VW) Beetle Body Dimensions, Measurements and Specifications

For Volkswagen (VW)  enthusiasts into body repair or restoration, the sources below may be of great help as a reference:

  1. Body measurements for the Volkswagen Beetle which can be a useful reference for replacing sheet metal. This was part of the forum responses from pakwheels.com on a 1965 Volkswagen Type-1 (Beetle) D.I.Y. Project.


Added larger letters with arrows pointing to the original letters which can be difficult to see. Text translation:

a) width of the front apron measured in the area of the first fender weldnuts (600mm)

b) width of the fuel tank well between the side members (693mm)

c) width of the fuel tank well along the longitudinal direction of vehicle (368mm)

d) distance between the first and last front fender weldnuts -left side (1118mm)

e) -right side (1120mm)

f) distance from the lower weld seam of the hinge pillar to the…

g) …upper corner of the rear roof rail (1394mm)

h) distance between the hinge pillar and the rear pillar -left side (935mm)

i) -right side (937mm)

k) distance between the hinge pillar and the rear pillar -left side (924mm)

l) -right side (923mm)

m) distance between the roof rail and the heater channel at the rear pillar -left side (1049mm)

n) -right side (1049mm)

o) width of the interior between the spot-welded flanges of the side window openings around the seat belt fasteners (1203mm)

p) width of the luggage deck between the wheel wells over the spot-welded seams between the front corner of the bottom rail/transverse wall and the rear corner at the bottom rail/side/wheel well (939mm)

q) left front – right rear (1989mm)

r) right front - left rear (1985mm)


     2. Below are the spec sheets  for a standard 73 beetle used as reference in replacing the front     quarter panel, apron front and rear etc. from the samba.com.


PREVIOUS RELATED POST:


Tags: ,,